# Actions (legacy)
WARNING
There is a new version of Pipedream Actions available. Legacy Actions will be deprecated. Get started with our quickstart for new actions or learn how to migrate legacy actions.
Actions are reusable code steps that integrate your apps, data and APIs. For example, you can send HTTP requests to an external service using the HTTP action, or use actions to send data to Slack, Amazon S3, and more. You can use thousands of actions across 100+ apps today.
Typically, integrating with these services requires a lot of code to manage connection logic, error handling, etc. Actions handle that for you. You only need to specify the parameters required for the Action — for example, for the HTTP action, what data you want to send and the URL you want to send it to.
You can also create your own actions that can be shared across your own workflows, or published to all Pipedream users.
# Using Existing Actions
Actions are executed in the order they appear in your workflow.
You can reference the
event,steps, andprocess.envvariables when passing params to an action.Action return values and exports may be referenced in later steps via the
stepsobject.You can add multiple Actions within a single workflow (for example to send data to multiple S3 buckets and an HTTP endpoint). Actions can be added at any point in your workflow.
Let's use the Send HTTP Request action to send an HTTP request from a workflow. First, add a new Action to your workflow by clicking on the + button between any two steps.
Choose the Send HTTP Request action:

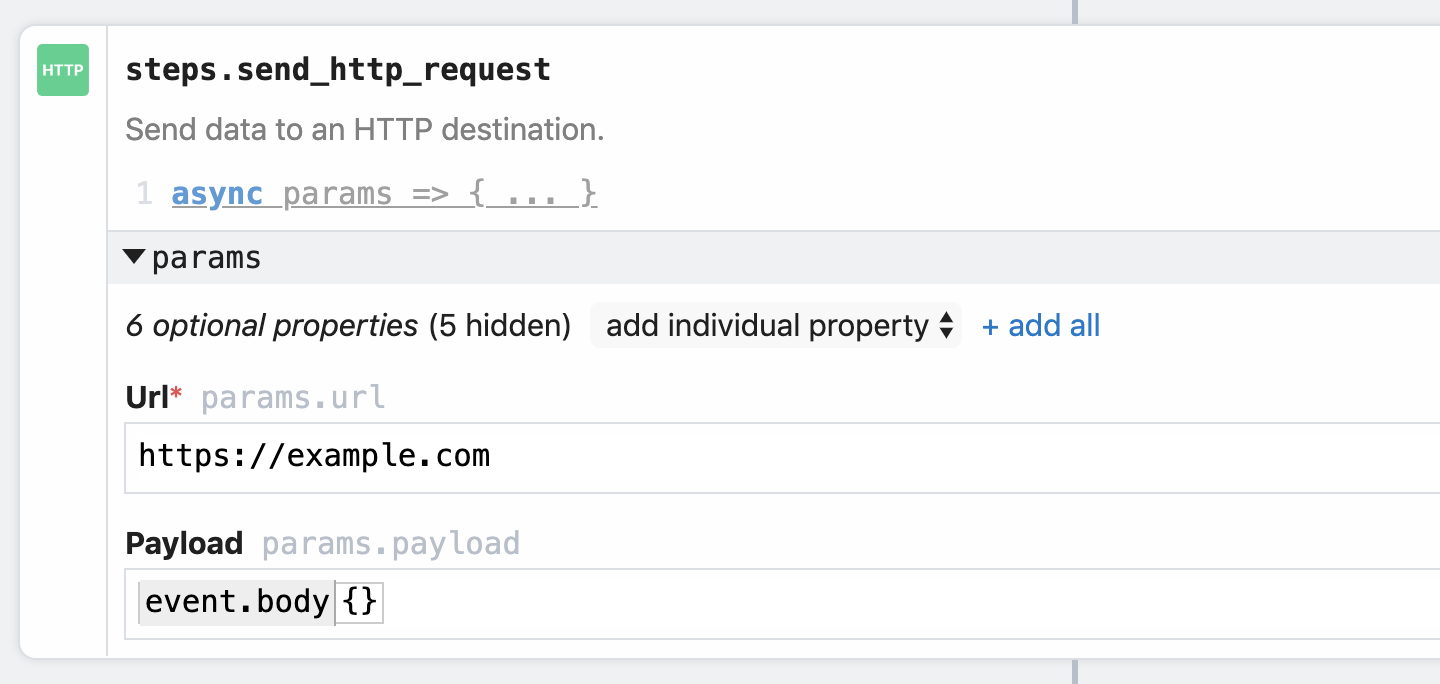
This action has one required parameter: the URL where you want to send the HTTP request.
This action defaults to sending an HTTP POST request. If you'd like to change the HTTP method, add an HTTP payload, query string parameters or headers, you can click the add individual property field above the form fields and select the appropriate parameter:

# Creating your own actions
You can author and publish your own actions at https://pipedream.com/actions, accessible from the Actions link in the header.
This video describes how to create an action end-to-end, including how to pass params to that action, how to associate actions with apps, and more:
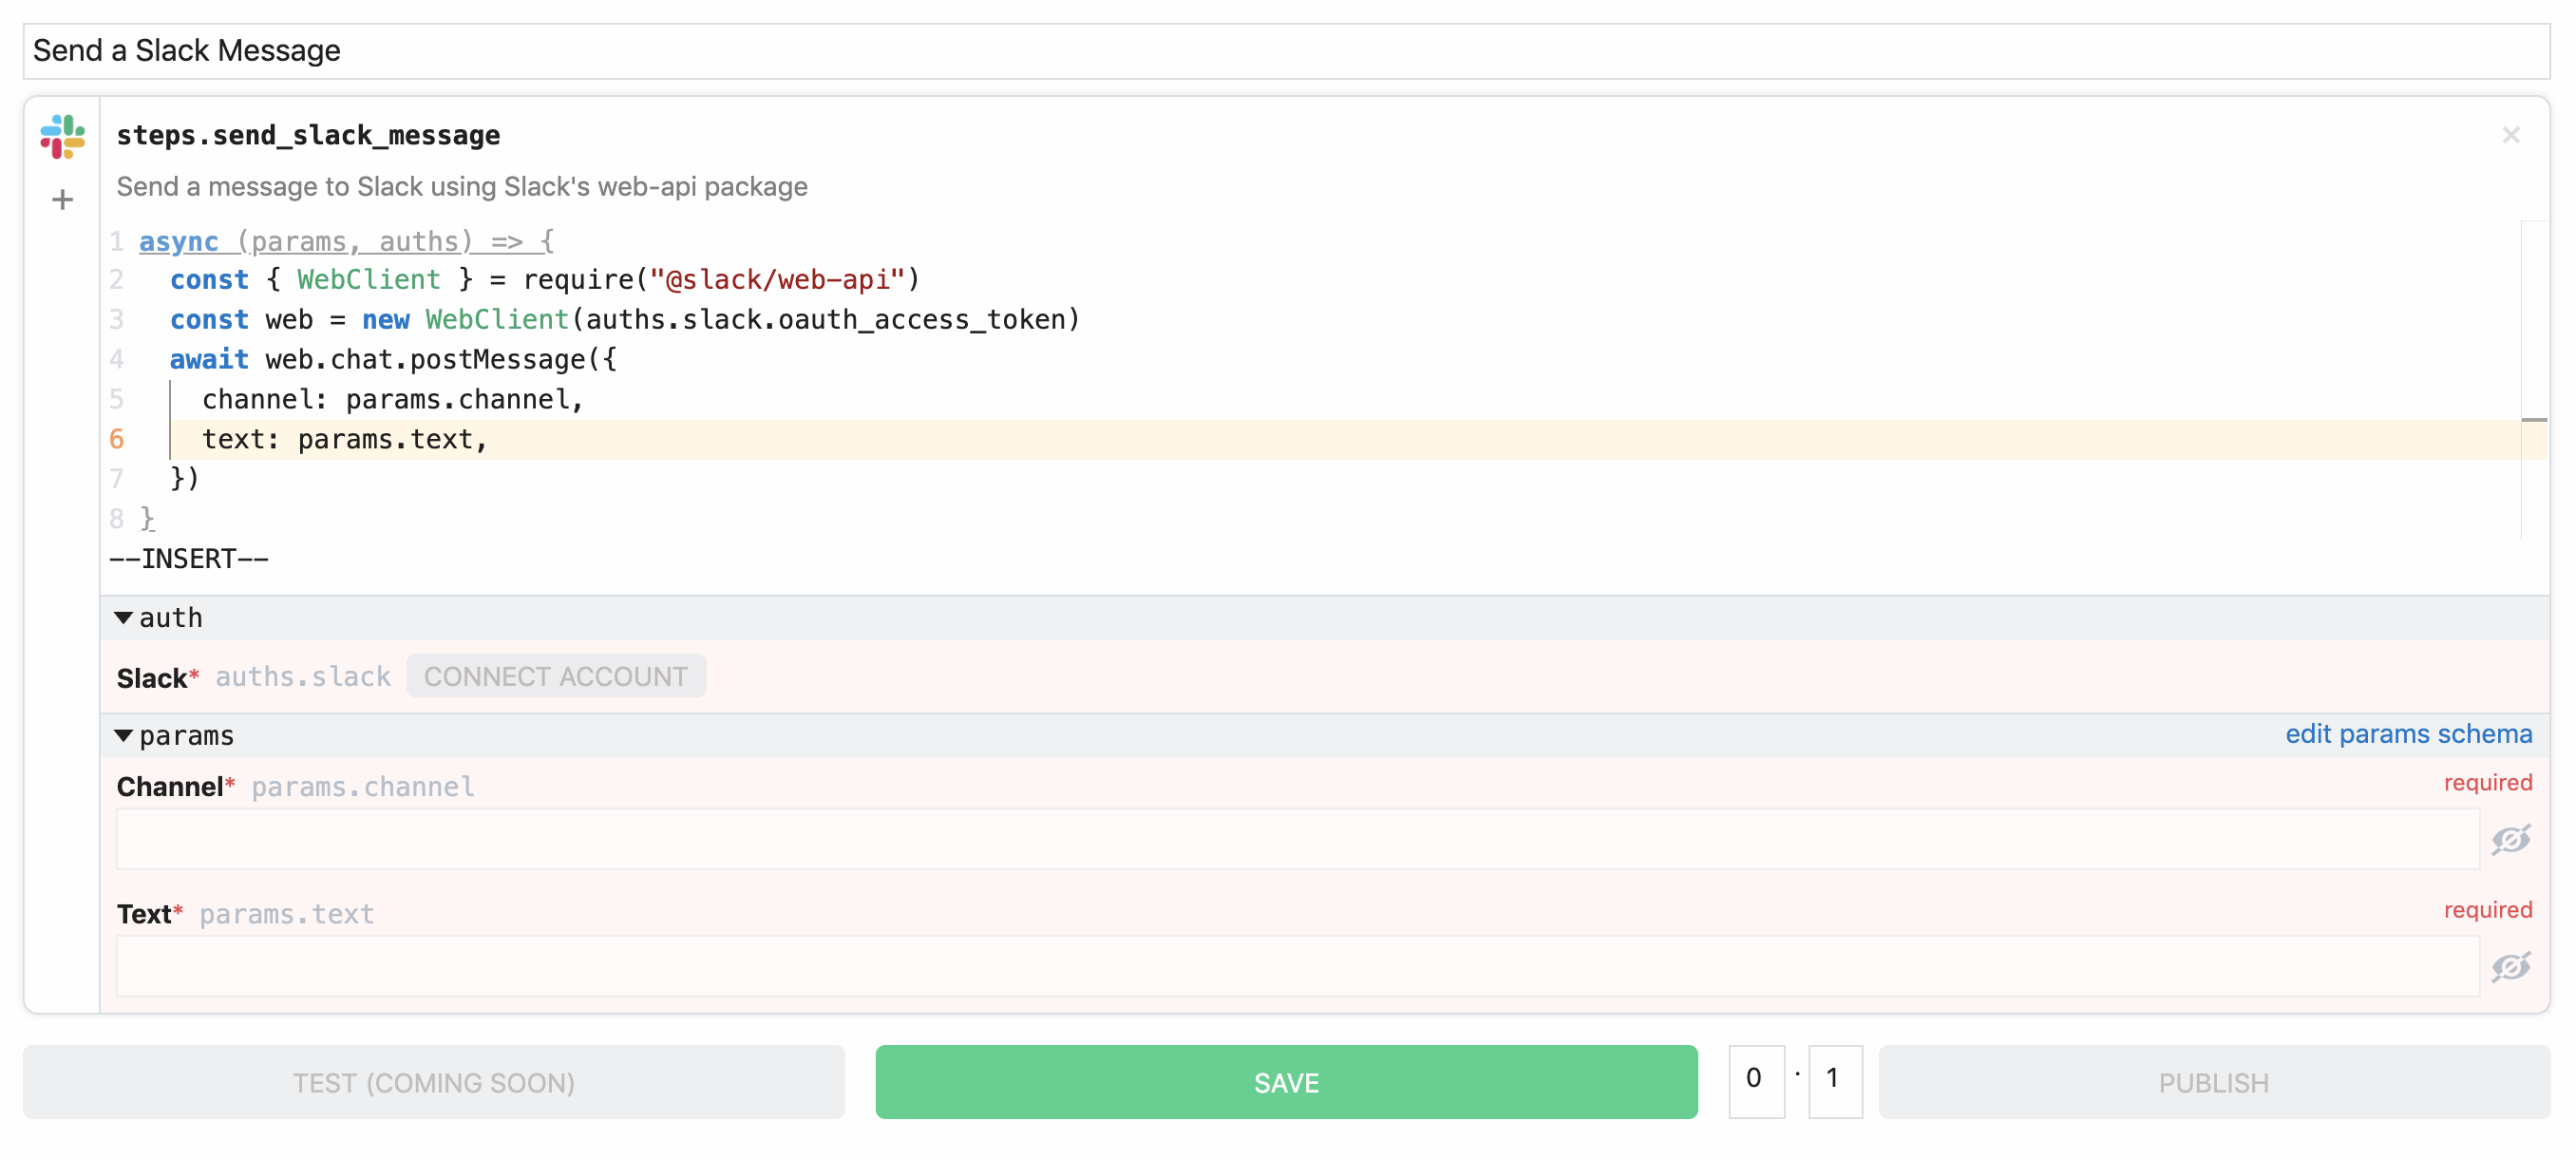
For example, let's say I wanted to publish my own Send a Slack Message action, using Slack's @slack/web-api npm package instead of the HTTP API.
I'd go to the Action header, click New, and start writing code:

Actions have a title, a default step name, a description, and code.
Actions are just code steps: you can write any Node.js code, connect apps, define params, and more. Unlike normal code steps, actions can be used across workflows and shared with other users. This reusability is powerful, and others benefit in huge ways from the actions you share.
# Converting existing code steps to actions
Often you'll have an existing code step that you want to convert to an action to reuse in other workflows. There are a few restrictions Pipedream imposes on actions to promote reusability.
# Replace references to event and steps with params
When you convert a step to an action, you lose access to the variables event and steps within your code. Actions must receive all input from params or auths.
Since actions can be used in any workflow, access to specific event data isn't guaranteed: for example, the shape of the event variable for the Cron and HTTP trigger is different. And since an action can be placed anywhere in a workflow, you can't ensure the action will have access to specific steps in the steps variable. Any user can rename a step, which would also break references to the steps variable in the action.
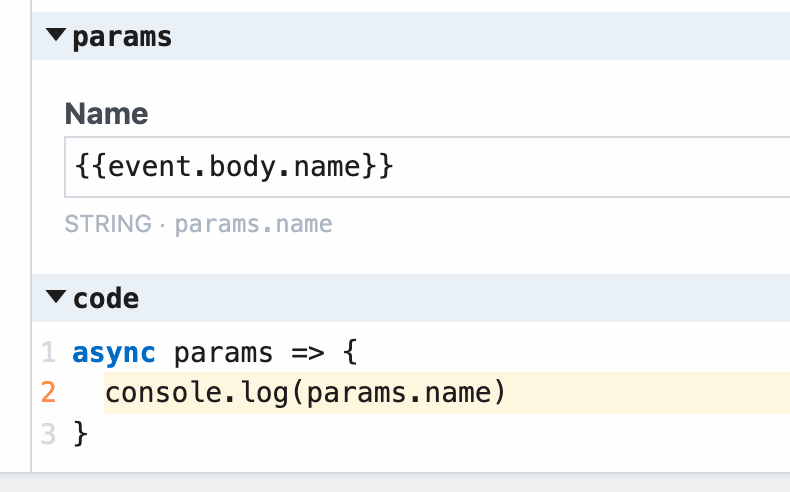
For example, if you've written a code step that references the variable event.body.name:

you'll need to reference params.name when you convert your step to an action, instead. This will expose a param where the user can enter their specific reference to the variable that contains the name, which would be event.body.name or another variable entirely:

# Replace references to $checkpoint with this.$checkpoint
Code steps normally have access to workflow state using the variable $checkpoint. But since actions run in different workflows, you don't know whether a user is referencing their own data in $checkpoint. References like this could delete a user's existing $checkpoint data:
$checkpoint = {
  newData: "newValue",
};
Instead, replace $checkpoint references with this.$checkpoint. this.$checkpoint sets state within a step, so it's safe to use in actions.
# Save vs. Publish
Saving an action makes the action available within any workflow in your account. Saving does not make the action available to anyone else.
When you press the Publish button, this makes the action available to everyone.
# How actions are associated with apps
If you've linked one or more apps (click the + sign to the left of the code), the action will be associated with that app, so when you search for the action when adding a new step, it'll show up under Github, Slack, etc.
Otherwise, if you haven't linked an app to the action, it'll show up under the Non-app actions:
# Versioning
Actions are versioned: each time you publish a change, it increments the minor version number (actions have semantic versions of the form [major].[minor]).
For example, publishing an action for the first time cuts a 0.1 version of that action. All users will have access to version 0.1 of your action.
If you want to make a change, you can edit and save your action, and those changes will be available only to your account. Once you're ready to ship the new version, click Publish again. Now,
- Any workflows that are using version
0.1of the action will continue using that version. - Any time a user searches for your action in a new step, they'll see the most recent version of the action (
0.2).
You can change the version in any manner you'd like before publishing that new version. For example, you can increment the major version of the action if you're introducing a breaking change.
# Limitations
Action code cannot reference environment variables (for example, using process.env). Since actions can be used by anyone, it's not guaranteed that a user would have a specific variable set in their environment. Therefore, actions that use environment variables are unlikely to work for someone else.
Instead, write your action to accept inputs via step params.